Showing posts with label project. Show all posts

Sunday, December 7, 2014

Go to coasters

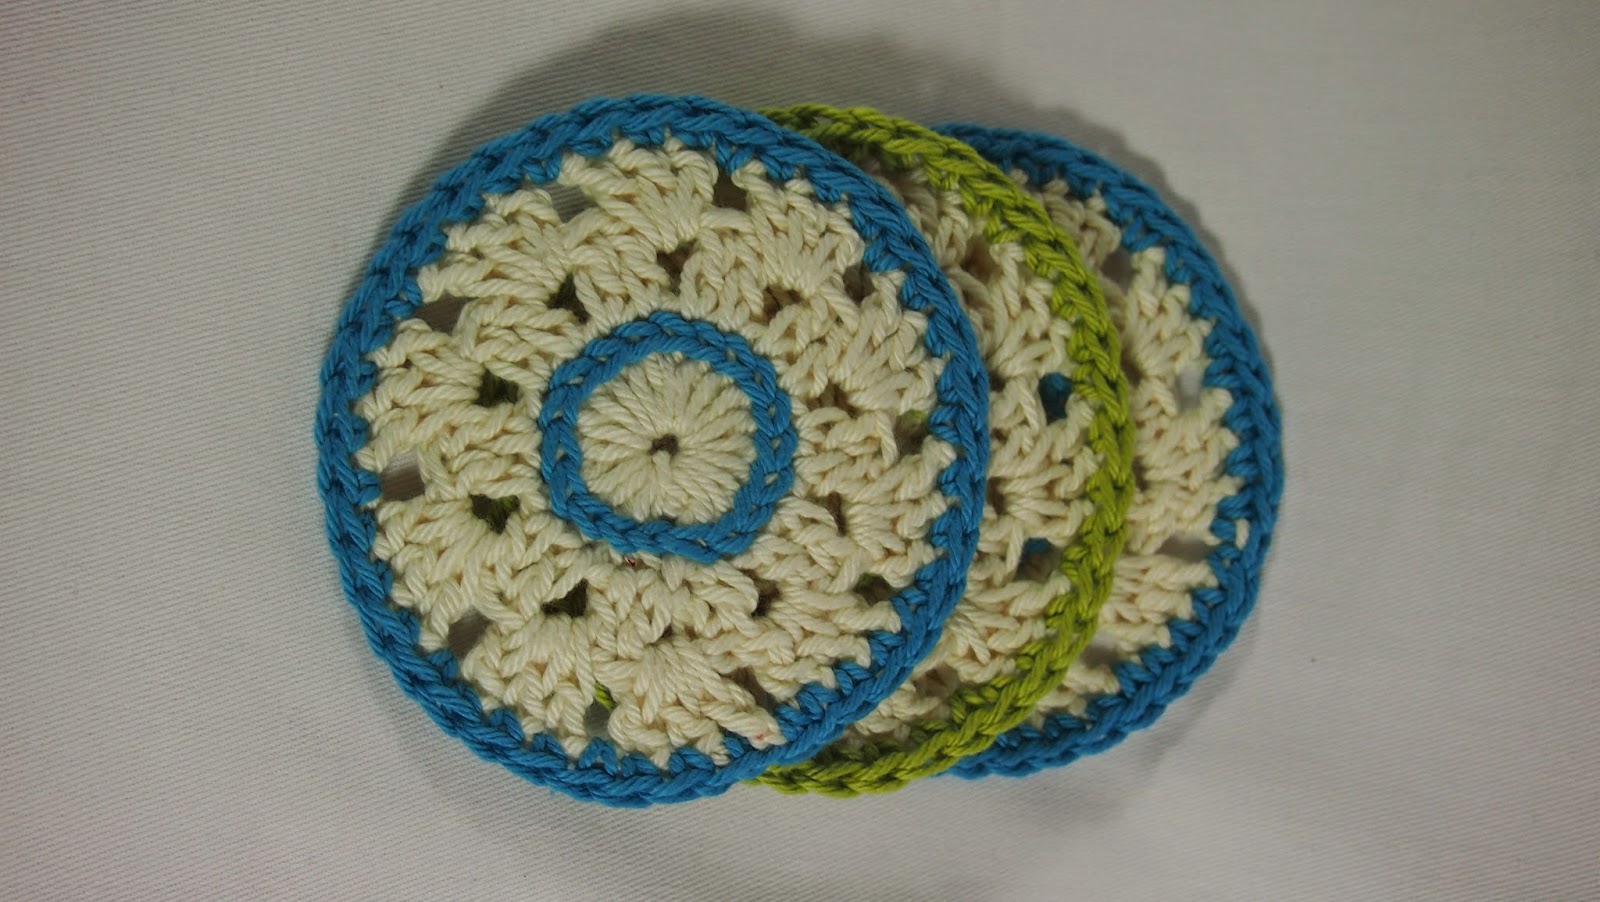
We have been able to move into our new home this April and one of the things that are a must have to me are lots of coasters, made to match every room they will be used in! So I came up with this little pattern: they work up quickly and are the perfect coaster size. Of course they make great inexpensive gifts, too!

My go to coasters


Materials:

- worsted weight cotton yarn in a main color (A) and a contrast color (B)
- I/5mm hook
- scissors and tapestry needle

1) with A, make a magic ring
2) 20 dc into magic ring, close with sl st into first dc
3) ch 2, *2 dc, ch 1, repeat after *, sl st into first dc
4) sl st into ch1-sp, [3dc, ch 1] into each ch1-sp, sl st into first dc, fasten off A
5) join B around a post of round 2
6) work surface sl st around each post of round 2, fasten off B
7) join B anywhere to round 4
8) ch 1, sc into each dc and each ch1-sp, sl st into first sc, fasten off B


Thursday, August 30, 2012

WIP Wednesday - again!

Wow, looks like I finished a lot of projects and gifts! The first one was a cute shirt for my daughter with matching bracelet and scrunchy:


Next up was a little package for a cute new baby boy:


And I had cool new idea (everybody probably does this, but for me it was an epiphany): Instead of writing some washing instructions on a tag, as I used to, I just put part of the yarn label on it! Love this idea, looks so much more professional.


The next package was for my Papa, whose birthday we forgot...


and, of course, the whole ordeal with Zoe's slipper... read about that in the slipper post!


And yesterday I finally got started on a bigger project again: my winter skirt! It is crocheted from side to side, but I want a horizontal color blending effect... so I planned the color changes very carefully:

I'm using four different shades of blue and they kind of create an ombre effect, what I was going for. I recently found a better method for that, but now that I have the yarn...
So, this is how far I've gotten. Sooooo many strands of yarn everywhere... it's a hassle and I'm still undecided, if I'll just switch to vertical stripes.


Okay, and now head on over, see what everyone else is working on!

Wednesday, August 29, 2012

A Slippery Project

My daughter has been in need of new slippers for a while now. But thankfully it's been very warm so she just jumped about barefoot. Now the summer is drawing to a close and I've finally finished her Granny Slippers (free Pattern from Bernat)! I wanted something a bit more fun and colorful... This is my yarn: Drops Nepal (65% wool, 35% alpaca)


It's so soft and wonderful to work with! At a very reasonable price, I might add...

The size seemed to be a problem, though. The children's size given in the pattern is supposed to fit a 6-7 year old. ZoĆ« is 3 1/2. "Luckily" her feet are enormous; she wears a size 11. So I read a couple of different size/age charts and afterword I was just as confused as before. The differences were huge! 

So I just got started. Only the slippers do not start at the sole, like most slipper patterns. I thought I might still try my luck and just went on to crocheting the hexagons.

Additionally, I tried out some new (to me!) crochet techniques. For the slipper on the left I joined the hexagons by slip stitching through both loops of the final round (right sides held together), for the one on the right hand side I only slip stitched through the outside loops. The outside loops are a winner!


I did the almost the same for the soles; on the left hand side I slip stitched through both loops of the final round and on the right hand side through the outside loops only. And again the outside loops win!


I also tried out starting a new round with a standing stitch, instead of the usual chains. I forgot to make little arrows, but on right hand slipper you can easily see the ch3 of the cluster round in off-white. On the left hand slipper you should be able to spot one cluster that looks a little knottier at the top than all the others. That's the beginning without the chain. Cool, huh?! Btw, here is the tutorial for the standing stitch...


Applying the latex took forever, because the tip kept clogging up on me all the time. And it takes 10 hours to dry...


And then... these extra cute slippers are too small!! 


So I improvised and blocked them over a pair of boots (one size too small for Zoe).


Now they seem to fit. But Littles remembers how weird they felt when they were too small and won't wear them... :-( 

Oh, yeah, and I think I'll have to add a button; the top is kinda wide now...
grrrr....

Wednesday, August 22, 2012

WIP Wednesday

I think I mentioned last week that one of my husband's old friends had a baby without giving us prior notice of the event... How dare he... ;-) Now the little guy is already two weeks old and hasn't yet received his gift! I'm almost done, though. Part one of his gift is this awesome Aviator Hat, designed by Bailee Wellisch (available via Ravelry).


By the way, this is Jolanda modeling the hat for us. Her head is more of a preemie size and yes, she does have some clothes... Well, they would only distract from the cute hat, right?


Part two of the gift are these Boy Striders by CrochetDreamz and they are almost finished, just need to sew on three more buttons. 


 The soft wool (it's a wool-alpaca blend) makes it hard to see the shape, but I'll stuff them with newspaper for the final pictures.

Once these are on their way, I'll make some much needed slippers for my daughter. I even bought the latex for the soles! These are going to be the colors:


And after that I'll make a quick gift for my Dad, whose birthday I forgot... But I have lots of red cotton and likes to relax in the tub, so it'll be something bath-related.

But what I'm really truly itching to get started on is my new woolen skirt for the coming fall/winter! More on that next time, but here are the colors:


Visit Kristine's WIP post and check out what everyone else is working on:

Wednesday, August 8, 2012

WIP Wednesday

Feels like I haven't done this in ages!

But I've been busy... soooooo busy... and even crochet busy!

I've been working on a short sleeved sweater for Zoƫ.


It's pretty much done, except for the crown I'm embroidering on the front. I found a free image and traced it with a children's felt tip pen. Comes off in warm wash, absolutely perfect! The yarn is superwash merino wool, so I'm not concerned. Yeah, and I'll block it after washing to add some length (I was stingy on the yarn...). But I think I'll have to stitch around the crown again, it's not as visible as I'd like it to be... oh, but the matching scrunchy and bracelet are done:


Also, I am crazy busy designing my own patterns. My head is full of ideas and I plan staring selling my patterns by January... The first one is pretty much finished, just working on the photography and getting it written up all nice and proper. Here's a little peak:


AND: An old friend of my husband's just became a father and we only found out today, after the baby boy has already been born. So I'e absolutely got to up with something really quickly! And make it a bit bigger, probably...

So, I'm too lazy to link to all the places I can think of. This means I'm just linking to my favorite crochet-person in the world: Kristine! ;-)


Sunday, July 1, 2012

Free Pattern: Granny Sleeves

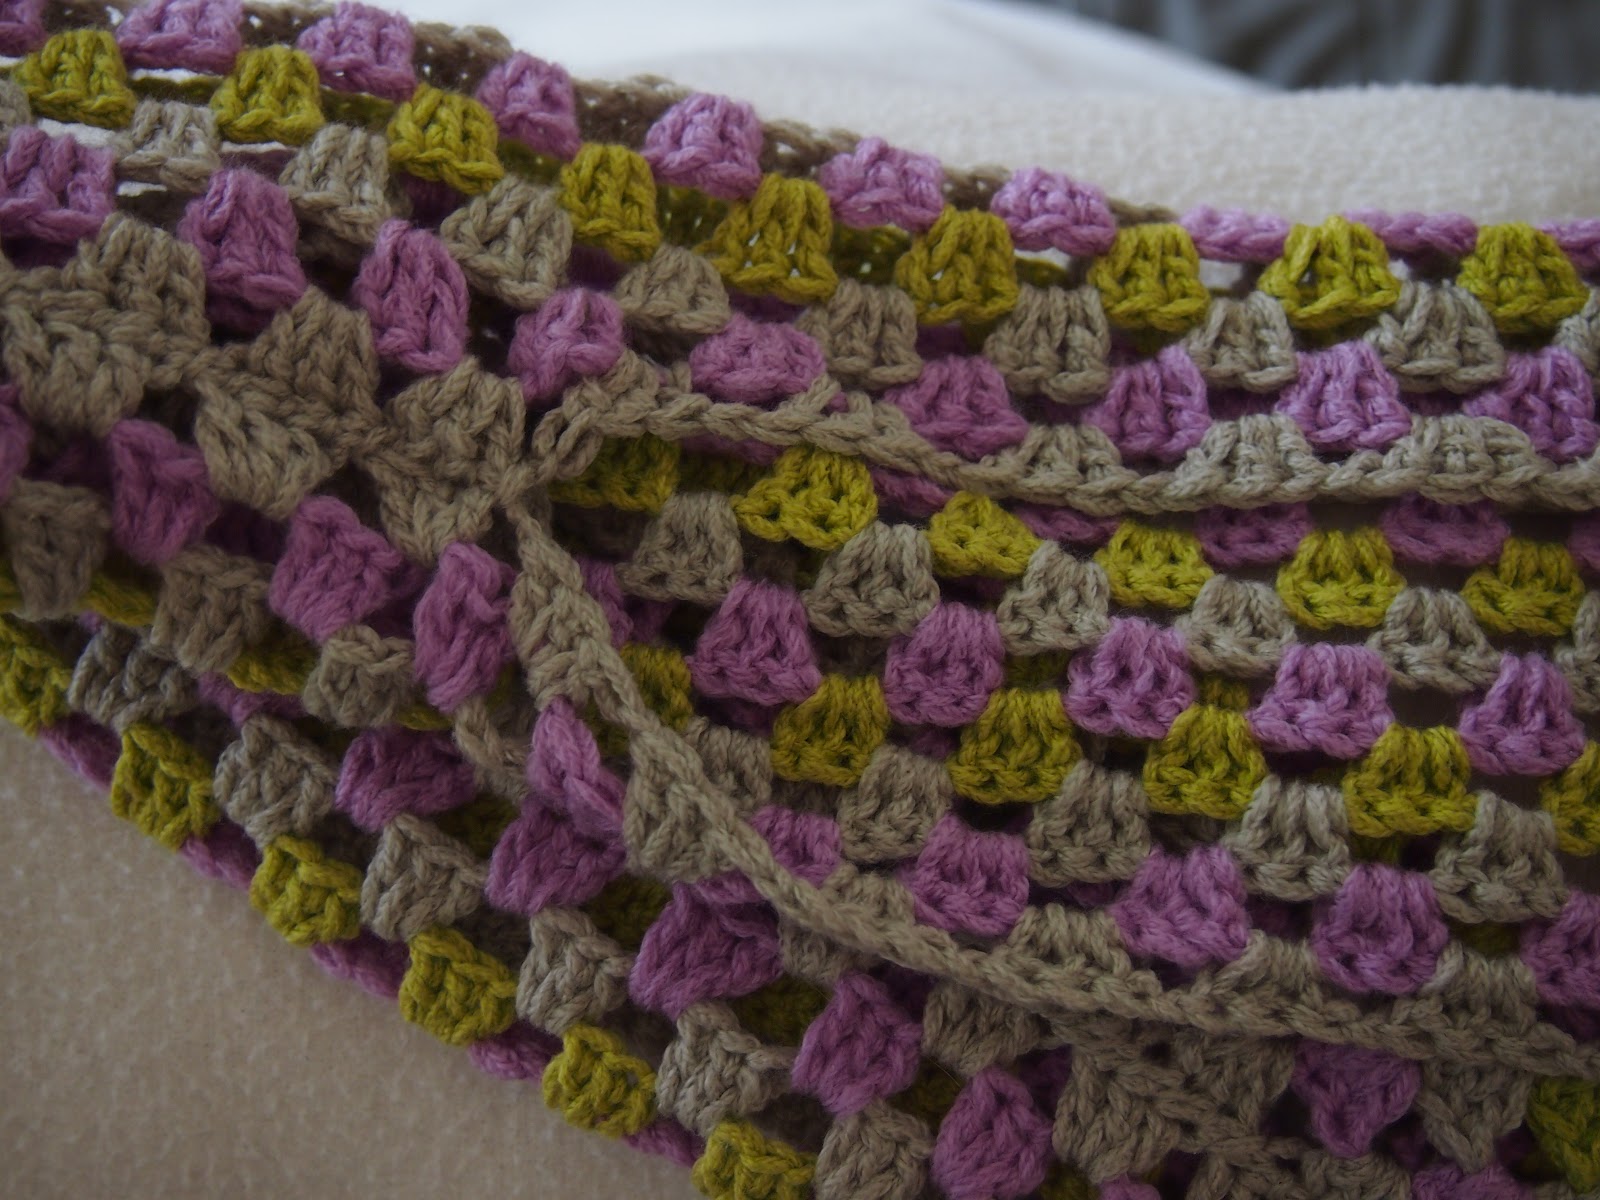
I made this beautiful wrap for my Mother's birthday


and the yarn was just soooooo yielding I figured I could make something for myself! And because I just love the look of the cluster stitches on the wrap I went for something with granny squares. I was going to come up with my own pattern but then I realized that I was combining two patterns: Nina Leon's Ribbed Sleevo Scarf and Suzetta Williams' Granny Scarf.


But I'll still give you a pattern for what I did, I call them my Granny Sleeves!


And you can also wear them as a scarf if it's too hot for long sleeves! So, here's the pattern:


Yarn: dk weight (I used just under 400 yards, but I'm tiny...)
Hook: 4mm (G)


Gauge is not important, you'll be working with the actual measurements


Colors: A = beige, B=pink, C=green (Just letting you know what I used, pick whatever you like!)


(1) 
In color A chain multiples of 4 for the length of you scarf. Keep in mind to subtract quite a bit since you'll keep adding to the length with each round. My foundation chain hung a little lower than my elbows and produced a full length sleeve. Guesswork, no formula, sorry...
Add 2ch and then 3ch for turning chain


(2)
dc into 4th chain from hook
dc in next 3ch
[ch1, skip 1ch, dc in next 3dc] repeat along scarf
dc into last 4ch
fasten off color A


(3)
attach color B in space between last two dc
ch3, 2dc,ch1
[3dc, ch1] 3 times into same space you attached B
[3dc in ch-space, ch1] repeat along scarf
[3dc, ch1] 4 times into space between last two dc
[3dc in ch-space, ch1] repeat along other side of scarf
join with sl into top of ch3
fasten off color B


(4)
attach color C in next ch-space
ch3, 2dc, ch1, 3dc, ch1 into same space
3dc, ch1 into next ch-space
[3dc, ch1, 3dc, ch1] into corner space
[3dc in ch-space, ch1] along the side of your scarf
work corners as described
join with sl into top of ch3
fasten off color C


(5)
Continue to add rounds as in (4) until the scarf is wide enough to wrap around the very top of your arm. If your yarn stretches take that into account, you'll want the sleeves to be pretty tight fitting at the top of your arms so you won't loose them!
Leave a long tail to sew first arm.


(6)
Fold scarf lengthwise and sew arms closed from the ends to the middle. Mine are 17" long, but again, I'm tiny...


(7)
Weave in all ends. Wear it!


Btw, I'd love to hear your opinion on how you like your patterns written. This is only the first one I'm actually writing down. Do you prefer brackets over asterisks? Do you like more line breaks and paragraphs? How easily can you follow the instruction?... Things like that...


Thank you so much for reading and your feedback!

Wednesday, June 20, 2012

WIP Wednesday

And it's Wednesday again!
I'm kinda between projects and I need my husband to take some pictures for me...


I have been working on a shrug that is mostly just sleeves and can also be worn as a scarf. Here's a brief glimpse:


Did you recognize the yarn? Yes, those are the leftovers from the wrap I made for my Mom's birthday! I loved the way the yarn looked in the cluster stitches, so I decided to make something with granny squares. This not entirely my own pattern, though; but I typed it up anyway. I'll be uploading it as a free pattern soon. (At least I hope it's going to be soon...)


And guess what? There's still some yarn left over! I'll try to make a matching hat for this little thingy...


Alright, now head in over to Kristine's and see what everyone else is doing:


Wednesday, June 13, 2012

WIP Wednesday

Current WIP: Slippers!


Well, this is just the toe cap of the first slipper, so... it's not really far along.

Soft slippers are just sooo comfortable around the house, love them! I used to wear a pair some "friend's friend" of my mother's had knit for me but they had become just too tattered to wear. So now I'm making me own! It's my first try at crochet footwear and no matter how much I like it, I solemnly swear I'll never start making sock! Maybe when I have grandkids...


Anyway this a free pattern by Calypso Gray, so give it a try!


BTW, have you noticed? The colors in the picture are the actual color I can see with me eyes! We caved and bought a new camera and it's sooooooo awesome!


Linking to  Kristine: :)

Wednesday, April 18, 2012

Work in Progress Wednesday: Doggy

After finishing TWO lambs for Easter (check out my  projects page on Ravelry, if you're curious), I'm working on a cute doggy for a friend's new baby. As usual, I don't know the sex yet or even when it'll be born. (He's my husband's friend and I asked him to find out, but... I mean, guys...) So I'm doing it now, just in case.


I fell in love with this pattern just after I learned how to crochet. I purchased it but didn't really know if I could handle something like this. Well, I'm still not sure it'll be as cute as I imagine it to be, but at least I know I crochet well enough. 


So this is how far I've come as of today:


That's the head with the nose already attached, the eye patch thingy, the ears and about two thirds of the body. On the left ear you can see how much the yarn splits but I'm getting used to it... it's a sport weight yarn and the pattern calls for a 1.5mm hook. Not too good for my eyes (the black nose was terrible to work on!) and even my fingers start to cramp up after a while.


I also find it strange to work in rounds AND turn my work. I guess that's to keep the seam straight in the back, but it's also a more noticeable seam... oh well...


I think I gotta start working on something else in between, this is just too hard to do while watching TV!


And now head on over to see what everyone else is working on:

Join us!
Button

Monday, April 9, 2012

Finished my Cardigan!

Okay, so it's been finished for a while now, I  just never got around to share it...
Tada: The blue cardigan and me


How I like it? It's quite all right, considering this is my first real wearable crochet project. I am satisfied with the size, though the small is still a bit wide around my waist and makes look kinda fat. O well, it's almost see-through, so people will be able to tell I'm not THAT fat... ;-)

Here are some more close ups of my work:


I like the way my modifies sleeves turned out, good length for a tiny person like me...


Had to go down one more hook size for the button cover, not sure why, but it worked out. This also isn't the original edging. The treble crochets turned out to be way to big, it looked ridiculous. So I went to look for a simpler version and used this edge from Crochet Adorned by Linda Permann.


I was going to add a list of everything I learned while working on this project, but it's getting late, so I'm saving it for another day...

Wednesday, March 21, 2012

Sweater and I are back!

After that nasty sinus infection stole about two weeks my life, I'm finally crocheting (and posting) again! I have a new smallish project, a padded sleeve for my beloved Kindle:


This is the pattern: http://www.ravelry.com/patterns/library/padded-kindle-sleeve
The colors are kinda dull in the picture, sorry...
I'm still thinking about embellishments, but I want it to keep a simple look, so... maybe nothing at all.


Also, I have made made some progress on my blue sweater! I crocheted one long sleeve, even though I new I didn't have enough yarn to make long sleeves. But the sleeves are crocheted from the bottom up because of the pattern. So I kinda had to make the whole thing to find out how to alter it. Finished it, put it together with safety pins and "put it on". And I was thrilled to see how well it fit! It would have been too long for me to wear that way anyway, but I decided to go with short short sleeves, I don't do 3/4 length on anything, I think it makes me look fat! So the yarn needle marks where I would have my new starting chain:


And then I spent an evening ripping the whole thing and turning it into neat new balls of yarn... Using those, I learned something: The yarn unwinds much better from a handmade ball than from the store bought skein! Makes my awesome yarn bowl much easier to use, too. Still, I think I'm just lazy enough not to wind my own balls... 

Oh, well, so I made the short sleeves and wet blocked (100% cotton) all the pieces on my super fancy blocking board, also known as our mattress for overnight guests...


This is my first blocking experience and I'm so excited to find out how it'll turn out! I was impressed with how much you can shape the wet fabric (and how tight my crocheting had become by the time I made the sleeves...) Can't wait to sew it together! I don't sew well, so I'm kind of nervous about that, too.


So far from my end of the world, visit Kristine's blog and check out what everyone else is up to: