Showing posts with label free. Show all posts

Sunday, December 7, 2014

Go to coasters

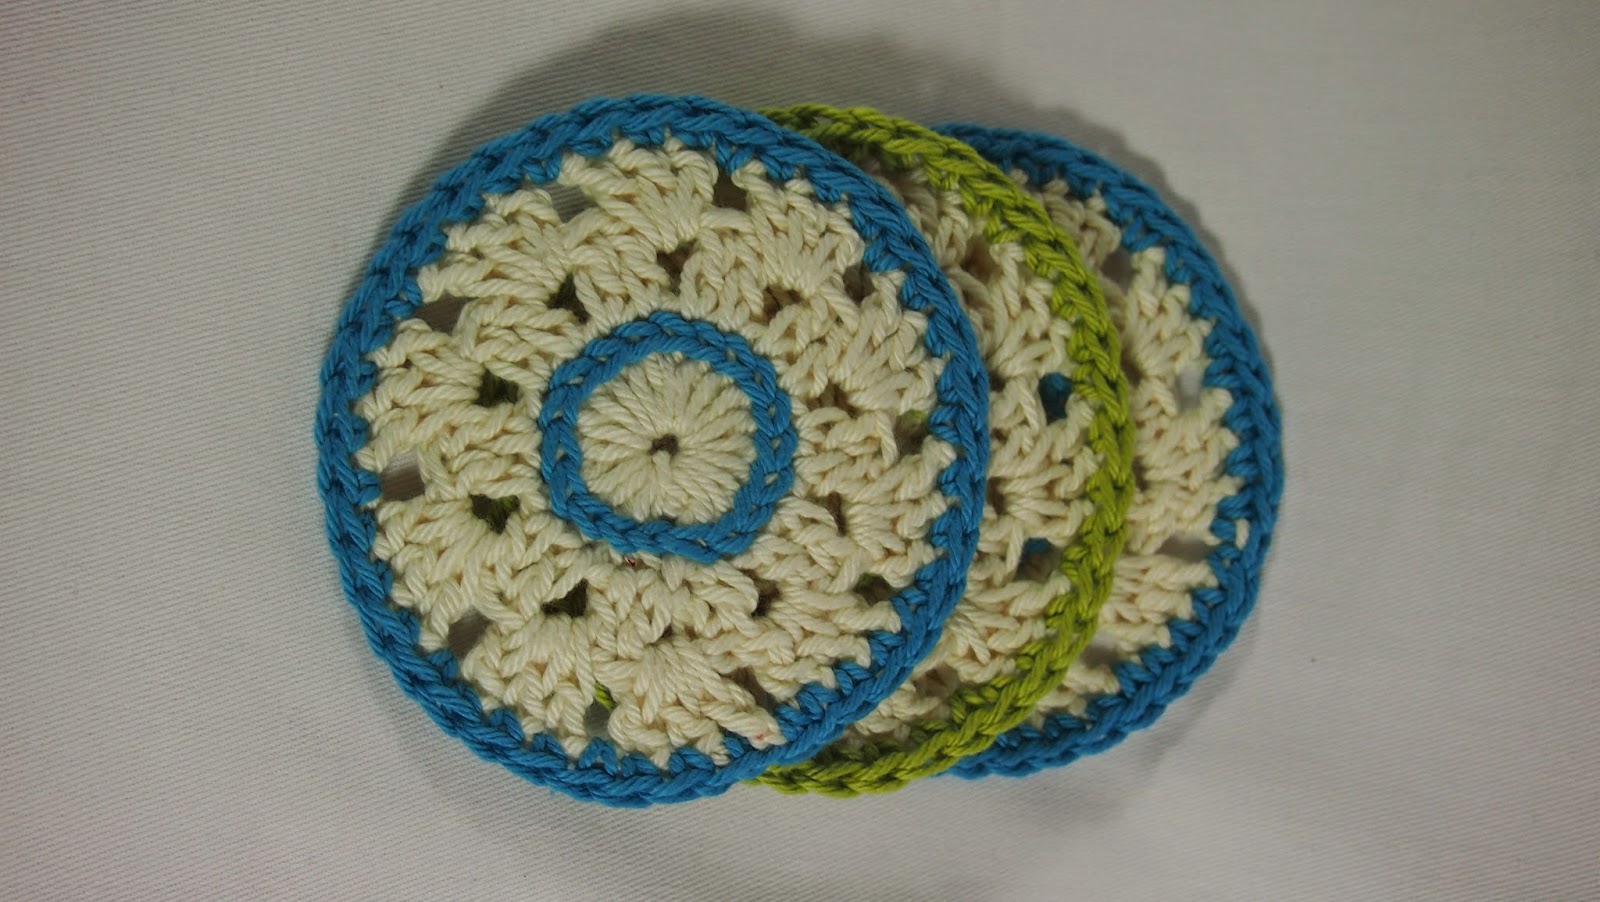
We have been able to move into our new home this April and one of the things that are a must have to me are lots of coasters, made to match every room they will be used in! So I came up with this little pattern: they work up quickly and are the perfect coaster size. Of course they make great inexpensive gifts, too!

My go to coasters


Materials:

- worsted weight cotton yarn in a main color (A) and a contrast color (B)
- I/5mm hook
- scissors and tapestry needle

1) with A, make a magic ring
2) 20 dc into magic ring, close with sl st into first dc
3) ch 2, *2 dc, ch 1, repeat after *, sl st into first dc
4) sl st into ch1-sp, [3dc, ch 1] into each ch1-sp, sl st into first dc, fasten off A
5) join B around a post of round 2
6) work surface sl st around each post of round 2, fasten off B
7) join B anywhere to round 4
8) ch 1, sc into each dc and each ch1-sp, sl st into first sc, fasten off B


Sunday, July 1, 2012

Free Pattern: Granny Sleeves

I made this beautiful wrap for my Mother's birthday


and the yarn was just soooooo yielding I figured I could make something for myself! And because I just love the look of the cluster stitches on the wrap I went for something with granny squares. I was going to come up with my own pattern but then I realized that I was combining two patterns: Nina Leon's Ribbed Sleevo Scarf and Suzetta Williams' Granny Scarf.


But I'll still give you a pattern for what I did, I call them my Granny Sleeves!


And you can also wear them as a scarf if it's too hot for long sleeves! So, here's the pattern:


Yarn: dk weight (I used just under 400 yards, but I'm tiny...)
Hook: 4mm (G)


Gauge is not important, you'll be working with the actual measurements


Colors: A = beige, B=pink, C=green (Just letting you know what I used, pick whatever you like!)


(1) 
In color A chain multiples of 4 for the length of you scarf. Keep in mind to subtract quite a bit since you'll keep adding to the length with each round. My foundation chain hung a little lower than my elbows and produced a full length sleeve. Guesswork, no formula, sorry...
Add 2ch and then 3ch for turning chain


(2)
dc into 4th chain from hook
dc in next 3ch
[ch1, skip 1ch, dc in next 3dc] repeat along scarf
dc into last 4ch
fasten off color A


(3)
attach color B in space between last two dc
ch3, 2dc,ch1
[3dc, ch1] 3 times into same space you attached B
[3dc in ch-space, ch1] repeat along scarf
[3dc, ch1] 4 times into space between last two dc
[3dc in ch-space, ch1] repeat along other side of scarf
join with sl into top of ch3
fasten off color B


(4)
attach color C in next ch-space
ch3, 2dc, ch1, 3dc, ch1 into same space
3dc, ch1 into next ch-space
[3dc, ch1, 3dc, ch1] into corner space
[3dc in ch-space, ch1] along the side of your scarf
work corners as described
join with sl into top of ch3
fasten off color C


(5)
Continue to add rounds as in (4) until the scarf is wide enough to wrap around the very top of your arm. If your yarn stretches take that into account, you'll want the sleeves to be pretty tight fitting at the top of your arms so you won't loose them!
Leave a long tail to sew first arm.


(6)
Fold scarf lengthwise and sew arms closed from the ends to the middle. Mine are 17" long, but again, I'm tiny...


(7)
Weave in all ends. Wear it!


Btw, I'd love to hear your opinion on how you like your patterns written. This is only the first one I'm actually writing down. Do you prefer brackets over asterisks? Do you like more line breaks and paragraphs? How easily can you follow the instruction?... Things like that...


Thank you so much for reading and your feedback!

Friday, February 10, 2012

Free Crochet Pattern: Textured Tumbler Cozies

Textured Tumbler Cozies 

:-) This is my first crochet pattern! Well, it's not really a pattern, just a neat little idea I wanted to share...

This little idea will keep your fingers warm, no matter how cold your drink! 


Yarn suggestions: Scraps, scraps, scraps! Make sure it’s easy care yarn (cotton, acrylic) and doesn’t stretch too much over time. 

Hook: Use the recommended hook size for your yarn. 

Gauge: Not essential, you will make your own custom size. 


Smooth Cozy 


Round 1: ch around the thickest part of your glass you want the cozy to cover. Chain loosely but have the chain fit tightly around the glass. Turn your work so the back ridges of the chain are facing you, join with sl to first ch

Round 2: ch1, sc in same st and in each back ridge of a ch, join to first sc with sl

Round 3-6: repeat round 2

Feel free to make your cozy as wide or narrow as you like!

Fasten off 


Ribbed Cozy  

Round 1: ch as described above, use a multiple of 3 (err on the tight side) 

Round 2: ch3, dc in same back of ch and in each back ridge of the ch, join to first dc with sl 

Round 3: ch3, bpdc in same st, bpdc, *fpdc, bpdc, bpdc, repeat from *, join to first bpdc with sl 

Round 4-5: repeat round 3 

Feel free to make your cozy as wide or narrow as you like! 

Fasten off 

Pseudo Crunch Cozy 


Round 1: ch as described above, use an even number of ch (err on the tight side)

Round 2: ch1, sc in same st, *hdc, sc, repeat from*, join to first sc with sl

Round 2: ch2, hdc in same st, *sc, hdc, repeat from*, join to first hdc with sl

Round 3-6: *round 2, round 3, repeat from *

Feel free to make your cozy as wide or narrow as you like!

Fasten off